CGW Figures: Difference between revisions
From Dickinson College Wiki
Jump to navigationJump to search
No edit summary |
No edit summary |
||
| Line 2: | Line 2: | ||
---- | ---- | ||
==Figure 1== | ==Figure 1== | ||
<big>'''The Legions'''</big> | |||
[[Image:CGW Fig. 1.png|x325px|none|'''Pila''']] | [[Image:CGW Fig. 1.png|x325px|none|'''Pila''']] | ||
==Figure 2== | ==Figure 2== | ||
<big>'''Gladius and Vagina'''</big> | |||
[[Image:CGW Fig. 2.png|x300px|none|'''Gladius and Vagina''']] | [[Image:CGW Fig. 2.png|x300px|none|'''Gladius and Vagina''']] | ||
==Figure 3== | ==Figure 3== | ||
<big>'''Plan of a Roman Camp (Rüstow)'''</big> | |||
[[Image:CGW Fig. 3.png|x350px|none|'''Plan of a Roman Camp (Rüstow)''']] | [[Image:CGW Fig. 3.png|x350px|none|'''Plan of a Roman Camp (Rüstow)''']] | ||
==Figure 4== | ==Figure 4== | ||
<big>'''Camp on the Axona'''</big> | |||
[[Image:CGW Fig. 4.png|x250px|none|'''Camp on the Axona''']] | [[Image:CGW Fig. 4.png|x250px|none|'''Camp on the Axona''']] | ||
==Figure 5== | ==Figure 5== | ||
<big>'''Vallum and Fossa'''</big> | |||
[[Image:CGW Fig. 5.png|x300px|none|'''Vallum and Fossa''']] | [[Image:CGW Fig. 5.png|x300px|none|'''Vallum and Fossa''']] | ||
==Figure 6== | ==Figure 6== | ||
<big>'''Section of Gallic Wall'''</big> | |||
[[Image:CGW Fig. 6.png|x200px|none|'''Section of Gallic Wall''']] | [[Image:CGW Fig. 6.png|x200px|none|'''Section of Gallic Wall''']] | ||
==Figure 7== | ==Figure 7== | ||
<big>'''Side View of Agger in Process of Construction'''</big> | |||
[[Image:CGW Fig. 7.png|x200px|none|'''Side View of Agger in Process of Construction''' | [[Image:CGW Fig. 7.png|x200px|none|'''Side View of Agger in Process of Construction''' | ||
a b, ''the enemy's wall.'' | a b, ''the enemy's wall.'' | ||
| Line 28: | Line 35: | ||
==Figure 8== | ==Figure 8== | ||
<big>'''Pluteus'''</big> | |||
[[Image:CGW Fig. 8.png|x150px|none|'''Pluteus''']] | [[Image:CGW Fig. 8.png|x150px|none|'''Pluteus''']] | ||
==Figure 9== | ==Figure 9== | ||
<big>'''Musculus'''</big> | |||
[[Image:CGW Fig. 9.png|x150px|none|'''Musculus''']] | [[Image:CGW Fig. 9.png|x150px|none|'''Musculus''']] | ||
==Figure 10== | ==Figure 10== | ||
<big>'''Vīnea'''</big> | |||
[[Image:CGW Fig. 10.png|x300px|none|'''Vīnea''']] | [[Image:CGW Fig. 10.png|x300px|none|'''Vīnea''']] | ||
==Figure 11== | ==Figure 11== | ||
<big>'''Catapulta'''</big> | |||
[[Image:CGW Fig. 11.png|x400px|none|'''Catapulta''']] | [[Image:CGW Fig. 11.png|x400px|none|'''Catapulta''']] | ||
==Figure 12== | ==Figure 12== | ||
<big>'''Ship's Prows'''</big> | |||
[[Image:CGW Fig. 12.png|x375px|none|'''Ship's Prows''']] | [[Image:CGW Fig. 12.png|x375px|none|'''Ship's Prows''']] | ||
---- | ---- | ||
<center>[[Caesar Gallic War]] | [[Bibliography of Editions Used]] | [[Maps and Tools]] | [[About]] | [[Contact]] </center> | <center>[[Caesar Gallic War]] | [[Bibliography of Editions Used]] | [[Maps and Tools]] | [[About]] | [[Contact]] </center> | ||
Revision as of 13:32, 15 April 2011
Figure 1
The Legions

Figure 2
Gladius and Vagina
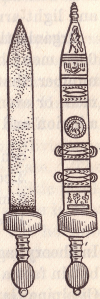
Figure 3
Plan of a Roman Camp (Rüstow)
Figure 4
Camp on the Axona
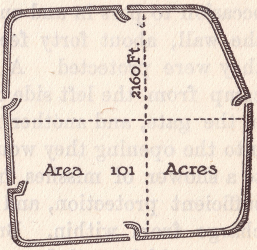
Figure 5
Vallum and Fossa
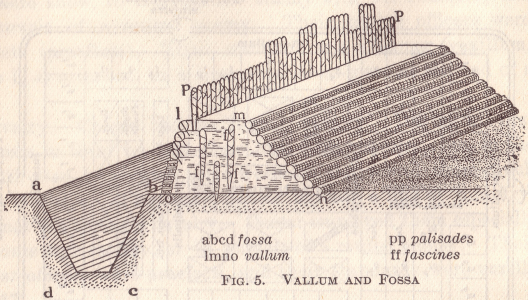
Figure 6
Section of Gallic Wall
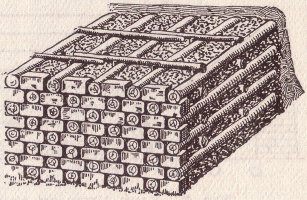
Figure 7
Side View of Agger in Process of Construction

Figure 8
Pluteus
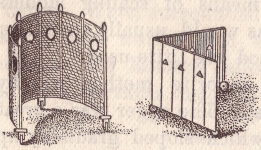
Figure 9
Musculus
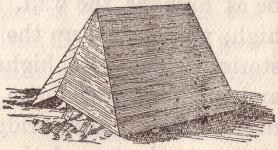
Figure 10
Vīnea
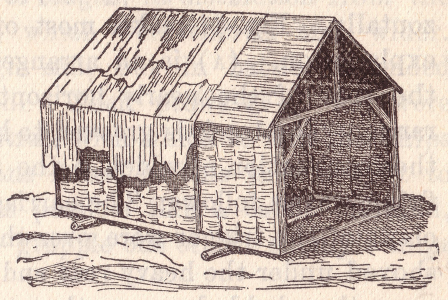
Figure 11
Catapulta
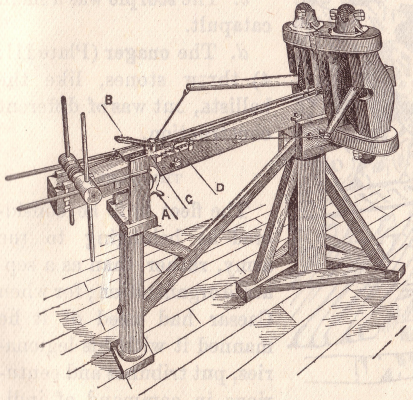
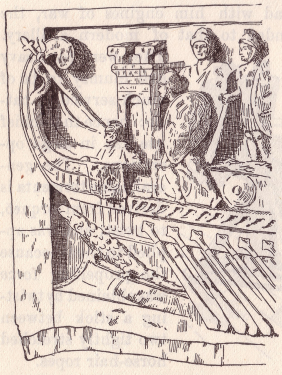
Figure 12
Ship's Prows
